Aging-in-Place Grab Bars Done Right: Placement, Blocking, and Stylish Options
Grab bars done right are anchored into solid wood blocking (or steel-rated mounts), placed where your body actually reaches during a transfer, and rated to hold at least 250 pounds of force. When they are installed this way, they look like a deliberate design choice rather than a hospital fixture, and they quietly do their job for decades. The two things that separate a safe bar from a decorative-looking one screwed into drywall are reinforcement behind the wall and placement based on how you move, not where there happens to be a stud.
If you take one thing from this guide: a grab bar is only as strong as what it's bolted to. A beautiful bar mounted into hollow drywall can rip out exactly when someone leans on it hardest. Below is how we approach grab bars for aging-in-place remodels across the Denver metro and Front Range, the Affordable Quality way.
Why placement matters more than the bar itself
Grab bars fail people not because they break, but because they're in the wrong spot. A bar installed for looks, or just wherever a stud happened to land, often sits where no one would naturally reach. Good placement starts with watching how a person actually enters the shower, sits and stands at the toilet, and steps over a tub wall.
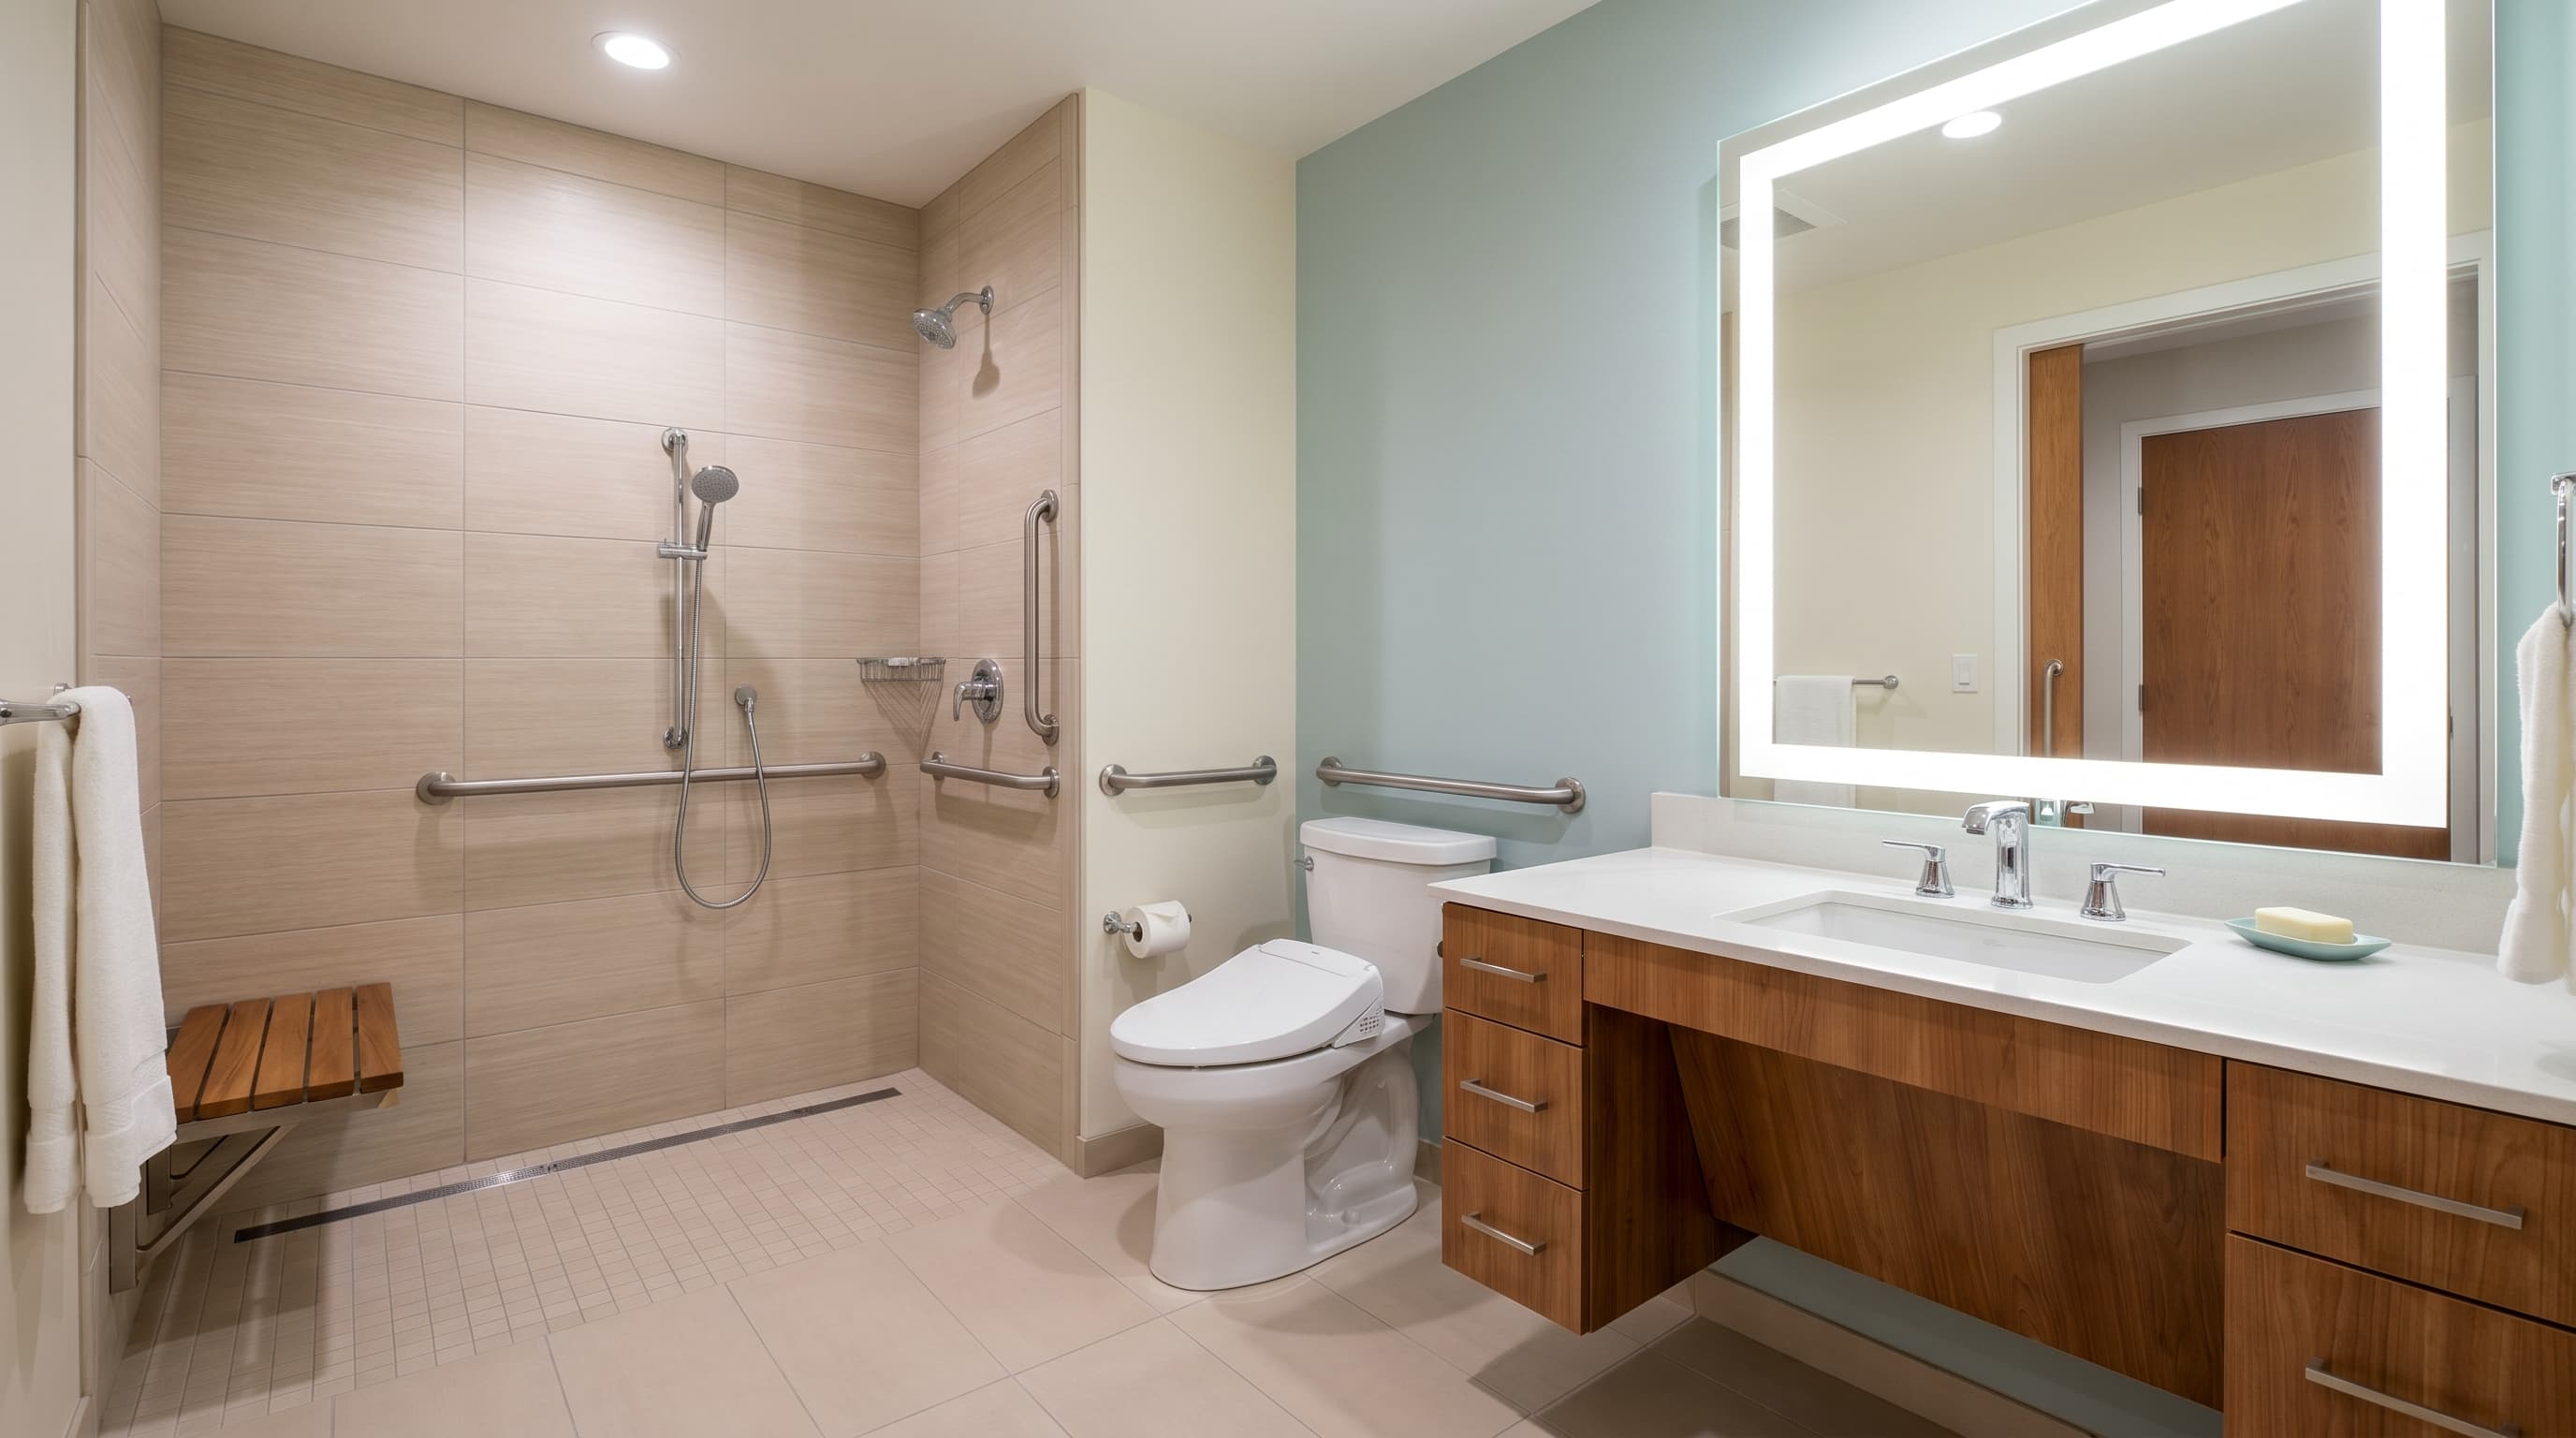
- Shower entry: a vertical bar near the threshold gives a stable hand-hold while stepping in and out, when balance is least certain.
- Inside the shower: a horizontal or angled bar on the back or side wall supports turning, reaching for controls, and standing while washing.
- Toilet: bars beside and sometimes behind the toilet make sitting and standing a controlled motion instead of a drop.
- Tub: a combination of a vertical bar at the entry and an angled bar along the long wall helps with the awkward step over the tub rim.
- Transitions: anywhere the floor surface or height changes, or where someone naturally pauses to steady themselves.
Height and angle are personal. A common starting range for horizontal bars is roughly 33 to 36 inches off the floor, but the right height depends on the user's stature and how they grip. Angled bars (often around 45 degrees) tend to feel more natural for sit-to-stand and step-over motions because the wrist stays in a comfortable position. The goal is a bar your hand finds without thinking.
Blocking and reinforcement: the part you never see
This is where safety is actually won or lost. "Blocking" means solid backing installed inside the wall, behind the finished surface, that the grab bar bolts into. Most building guidance expects a properly mounted grab bar to withstand at least 250 pounds of force in any direction. Drywall and tile alone cannot do that. The reinforcement behind them does.
There are a few honest ways to get there:
- Solid wood blocking: during a remodel with the wall open, we install horizontal 2x lumber (or wider plywood backing) between the studs at the heights where bars will go. This gives you freedom to place bars exactly where they're needed, not just on studs.
- Continuous plywood backing: a sheet of plywood across the studs behind the cement board turns nearly the whole wall into a mounting surface, which is ideal if future bar locations aren't fully decided yet.
- Into studs: when blocking isn't possible, bars must hit solid framing with appropriate lag screws. The limitation is that studs are only every 16 inches or so, which constrains placement.
- Heavy-duty rated anchors: for finished walls that can't be opened, certain engineered anchors are designed for grab-bar loads. They are a real option, but they are a fallback, not a substitute for blocking when the wall is already open.
The big advantage of planning reinforcement during a remodel is cost and freedom. Adding blocking while the wall is already open is inexpensive and lets you place bars by ergonomics instead of by stud location. Even if you're not installing every bar today, we can add blocking now so future bars go in cleanly, no demolition, no guesswork. That is exactly the kind of forward-thinking, affordable detail that pays off later.
Stylish grab bars that don't look clinical
The old image of a grab bar is a cold, institutional steel tube. That image is out of date. Today's bars come in finishes and forms that read as upscale bathroom hardware, because in many cases they're designed to match your towel bars and faucets.
- Matching finishes: brushed nickel, matte black, oil-rubbed bronze, and polished chrome let a grab bar coordinate with the rest of your fixtures so it disappears into the design.
- Dual-purpose hardware: integrated towel bars, corner shelves, and toilet-paper holders that are secretly rated grab bars. They look like accessories and perform like safety equipment.
- Textured and knurled grips: subtle texturing improves grip when wet without looking medical, and it photographs like a design feature, not a hospital part.
- Continuous and angled designs: sweeping single-piece bars and angled assemblies look intentional and architectural rather than tacked-on.
- Coordinated seating: a sleek fold-down or built-in shower bench paired with a well-placed bar reads as a spa feature, not an accommodation.
The trick is to choose bars at the same time as the rest of your bathroom hardware, and to design the layout so the bars belong to the room. When safety hardware matches the faucet and the lighting, guests see a handsome bathroom; you get the security underneath. That's the heart of aging in place done well: independence and dignity, without your home announcing it.
Common mistakes to avoid
- Suction-cup bars used as real grab bars. They're fine as a light balance cue, never as something to catch a fall.
- Bars mounted into tile and drywall only, with no blocking or stud behind them.
- Placement chosen for symmetry or looks instead of how the person actually moves.
- Forgetting future needs. Even if mobility is fine today, adding blocking during a remodel is the affordable insurance.
- Mixing safety with a slippery floor. The best grab bar still works better alongside slip-resistant flooring and a curbless or low-threshold entry.
Aging-in-place design is most powerful when it's woven into a remodel from the start, so reinforcement, layout, and finishes all come together as one coherent, attractive bathroom rather than a series of add-ons.
Frequently asked
Sometimes. If you're not remodeling, bars can be mounted into wall studs or with heavy-duty anchors specifically rated for grab-bar loads. The catch is that placement is limited by where the studs fall, and standard drywall anchors are not safe for this. The best results come during a remodel, when we can add solid blocking inside the open wall and place bars exactly where your body needs them. We're happy to look at your situation and recommend the safest realistic option for a free estimate.
Building guidance generally expects a properly installed grab bar to withstand at least 250 pounds of force in any direction. Reaching that number depends almost entirely on what's behind the wall, solid blocking or framing, not on the bar alone. A quality bar mounted into reinforcement easily meets it; the same bar in hollow drywall does not.
Designer-finish and dual-purpose bars are widely available and far less institutional than they used to be, so you can have hardware that matches your faucets and towel bars without it looking medical. We keep recommendations qualitative and focused on value, that's the Affordable Quality approach, and we'll walk you through options that fit your bathroom and your goals during a free estimate.
Keep reading
Ready to start your remodel?
Free consultation and estimate · 12 months same as cash · 5-Year Labor Warranty.